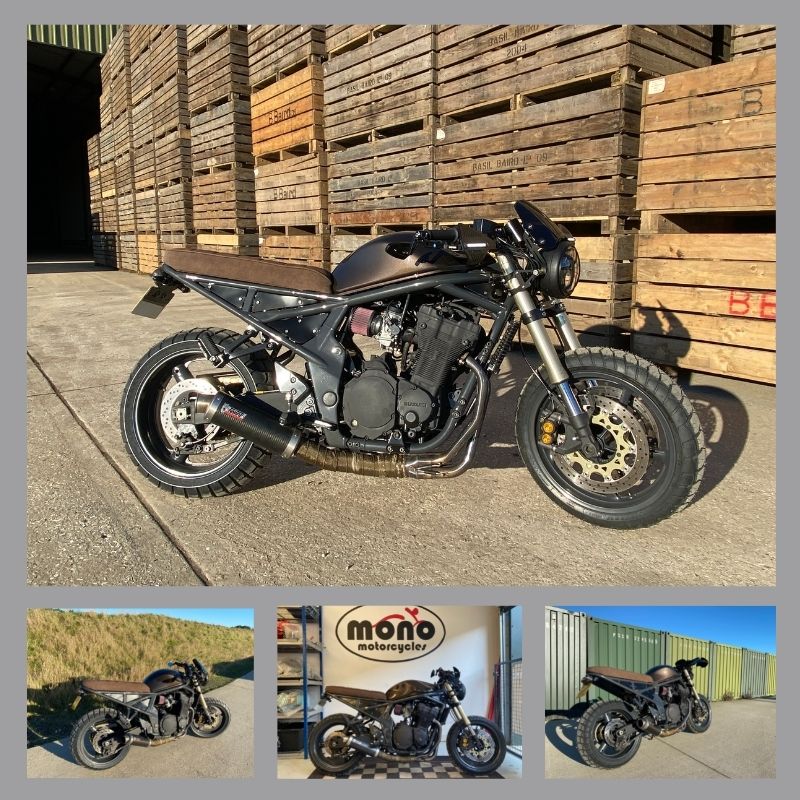
The ‘Dirty Bandit!’ Suzuki Bandit 1200 MKII full customisation.
Suzuki Bandit 1200 MKII full customisation.
Background story
We were contacted by one of our existing customers to enquire about the possibility of customising a Suzuki GSF1200 Bandit. Our customer showed us some photographs of a bike he had purchased which had already had some fabrication work done.
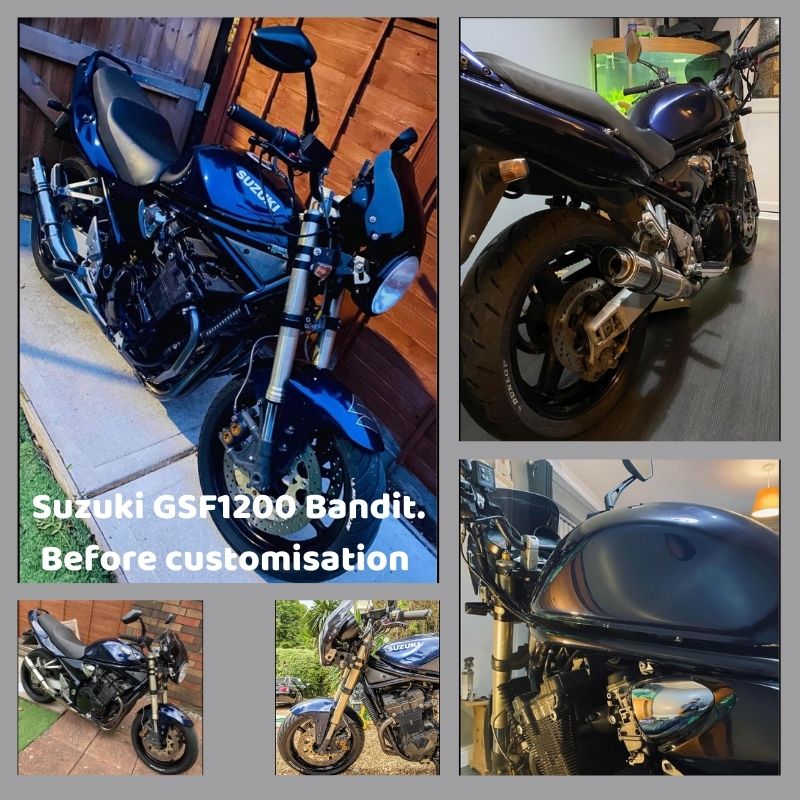
Our customer didn’t really have much idea of what he wanted or how to achieve the end goal, but he did sent us photographs of a GSF1200 customisation he found on the internet of a flat tracker/scrambler style. Once we had chatted a few times we got a picture in our heads of the kind of idea the customer wanted.
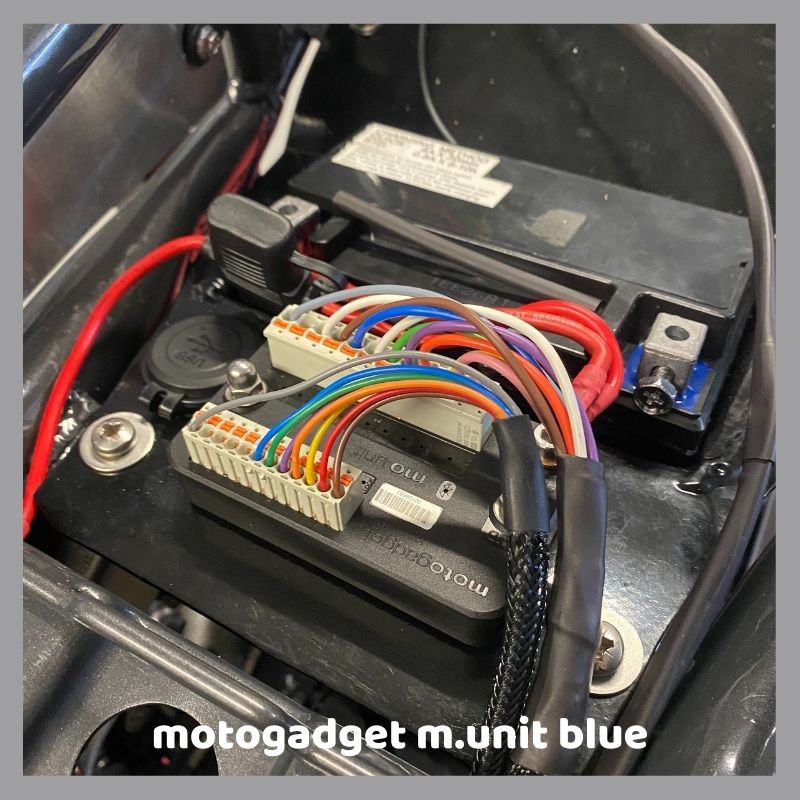
One thing he did know was he wanted an entire motogadget rewire, to take advantage of the minimalistic momentary push switches which could replace the original switchgear, heated grips & a couple of USB ports to charge his phone & sat-nav. He also mentioned he would like a long flat seat so if need be, he could take a passenger
At this point we advised the customer know that for all of the customisations he was looking for, he should budget for between £8K-£10K.
Fabrication
When the GSF1200 was received, it became evident immediately that the original fabrications made to the rear of the bike were not safe. With the frame having been compromised & a curved seat hoop having been fitted; it was deemed that the previous modifications, which included extensive modifications to the rear end of the bike were dangerous.
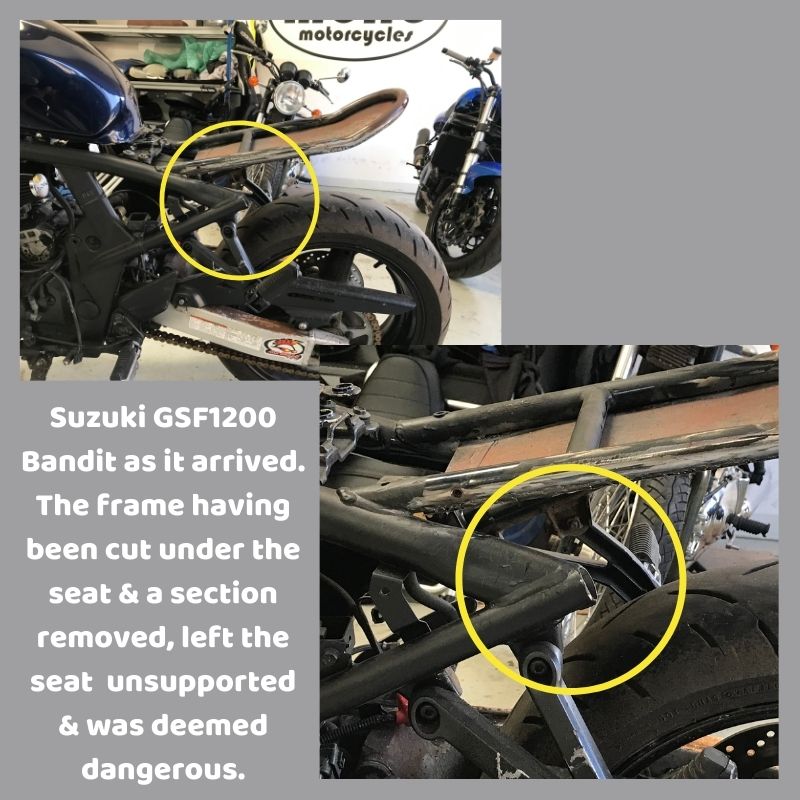
We therefore had to start again by fabricating a new rear end, seat hoop, rear hangers, under tray, battery box, side panels & seat base.
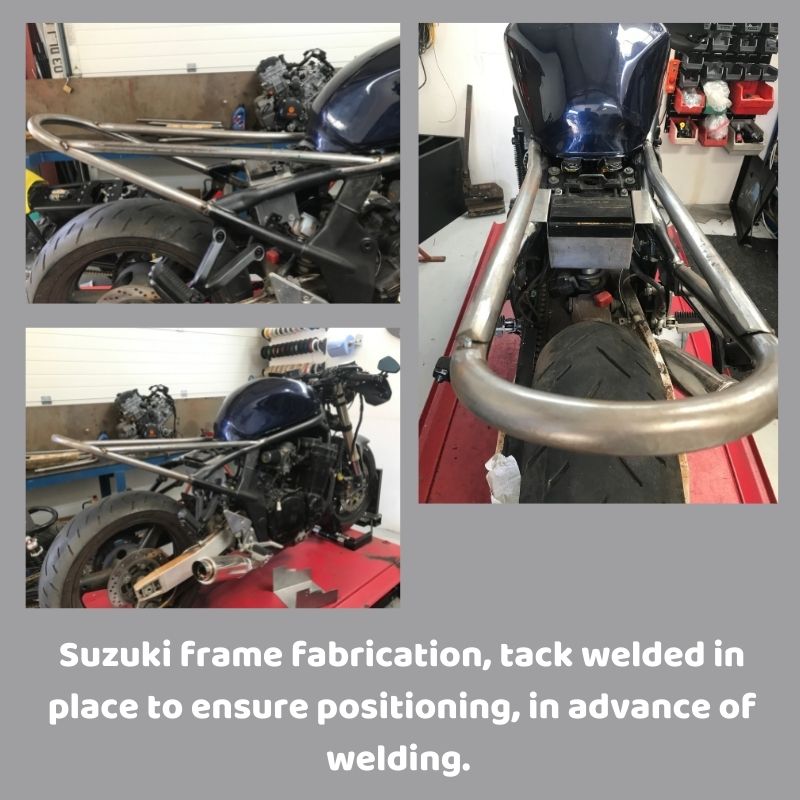
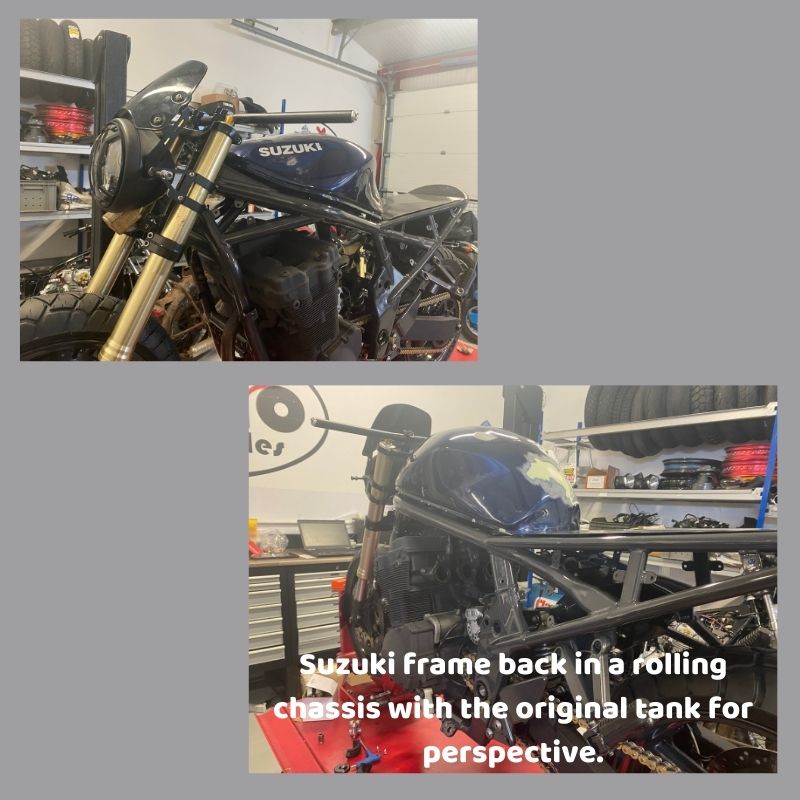
We started by cutting off the old hoop & bending some new tubes, taking them in at the top so the seat wouldn’t be too wide. We then brought the tubes up to meet the hoop, this made the rear much stronger.
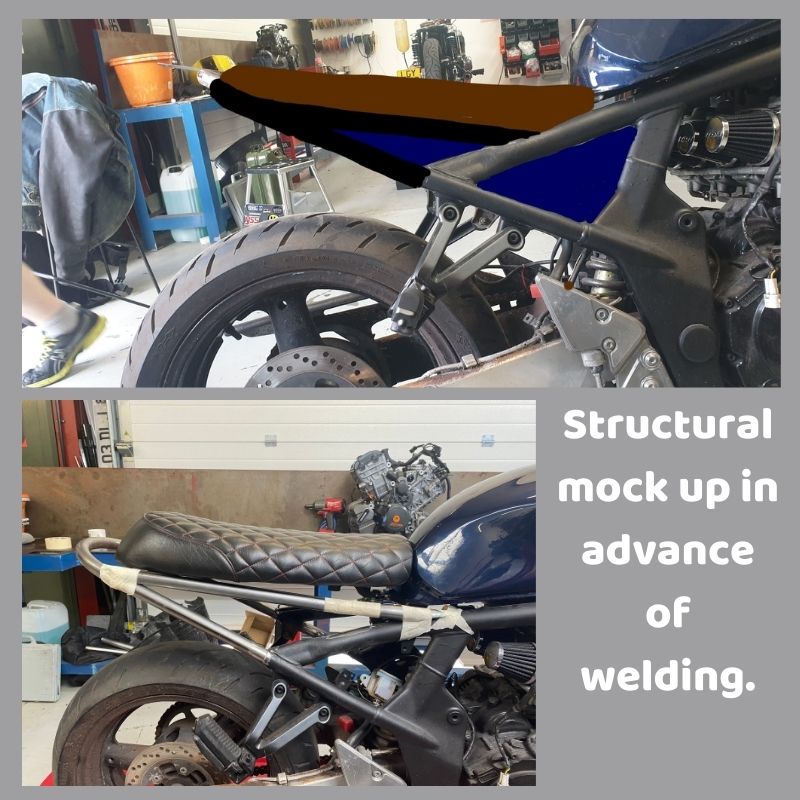
Once happy we could tack them in place ahead of a full strip down. The bike was then stripped to a bare frame so the welding, cleaning & paintwork could commence & in the process removed the wheels, engine, swing arm & shocks.
We also cut off the front mount for the headlight so the new light could sit further back. Before coating tabs were added for the side panels, now made in alloy which gave a much better look than the stock plastic items.
We also noticed on the strip down that the handlebar mounting clamps had been drilled through the top yoke, leaving only 5mm of alloy & about 3 threads into the clamps! This was very dangerous so we tig welded a plate on the underside giving a good 25mm for the clamps to bolt down to, once coated new longer bolts were fitted.
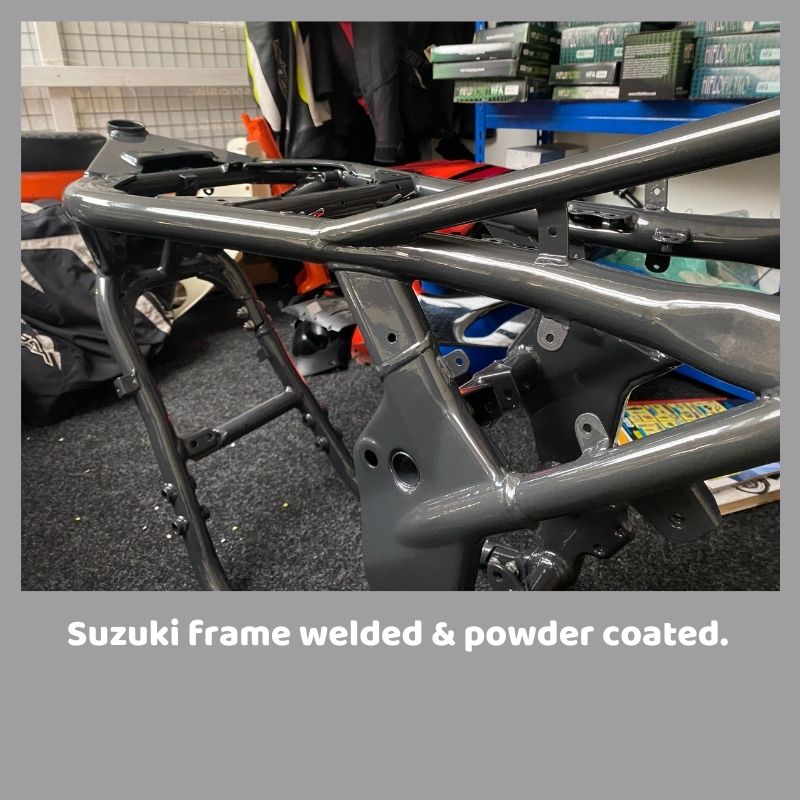
While the frame & additional parts were off being powder coated, the engine & swing arm were steam cleaned. The engine was then painted with a heat resistant paint, as was the swingarm, headstock & other dirty components.
Once the frame & additional powder coated components were returned, the delicate task of reseating the engine began.
To ensure the freshly powder coated frame was not damaged, the engine was wrapped in soft blankets & hanging from an engine hoist, refitted to the frame.
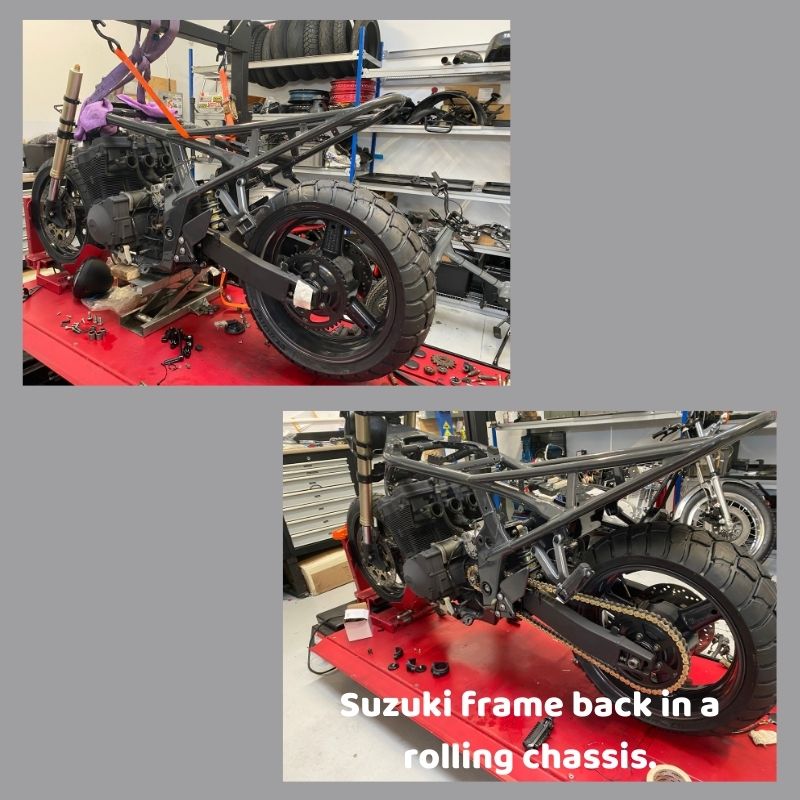
The wheels were built up with new bearings, chain, sprockets & new Michelin Anakee 3 tyres giving the off-road look while still giving outstanding road holding. At this stage we fabricated a speedo mount for the new GPS speedo. This comprised of a piece of 3 inch exhaust tube welded to a plate, & once the holes were drilled, it was sent off for powder coating.
Looking at the front of the bike we thought it needed something else. Therefore, we offered up the screen we had removed from Daniel’s Triumph bobber. It looked really good with the handguards that had been provided, making the front look wide & aggressive.
We did have a small issue that the bars the customer provided were not long enough for all the switches & other components & therefore a quick internet search came up with a wider pair.
With the Bandit coming together we turned our attention to the carbs. These were fully stripped, ultrasonically cleaned & rebuilt with a stage one Dynojet kit. Now avid readers of our blog’s may have read about the hassles we have had running pod filters on C.V type carbs. This is due to the air going into the carbs so fast that the vacuum slides don’t lift under load.
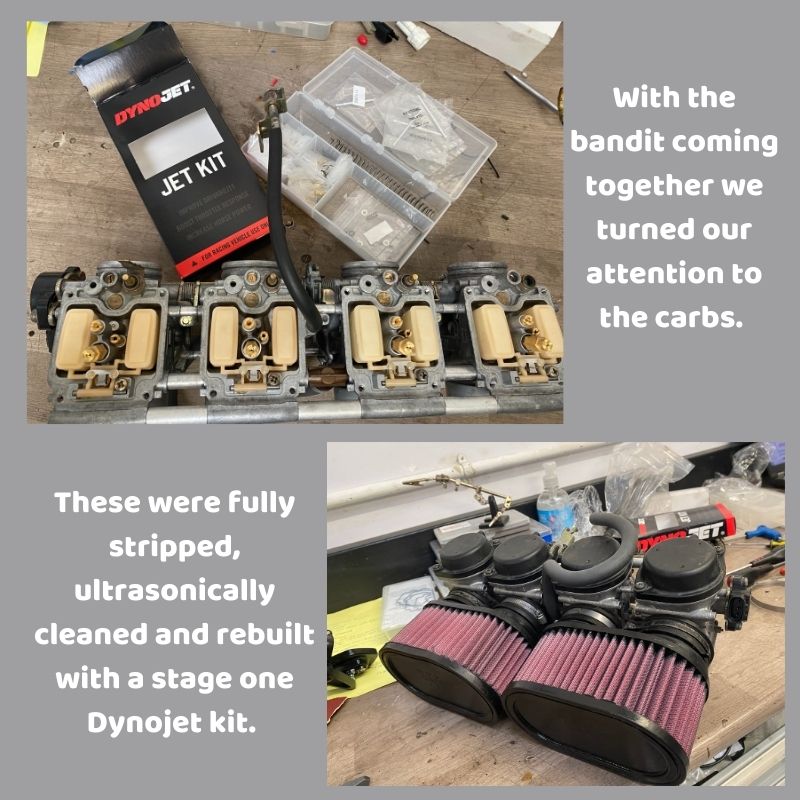
The customer had purchased some pod filters which were ok but didn’t fit too well & looked out of place with the style of the rest of the bike. Therefore, we invested in some K&N filters for it. We knew this still might not slow the air enough, but first we had to get it running.
Prior to paint we had made a undertray to accept the m.unit & battery box. This was powder coated in gloss black & ready to bolt back onto the bike.
Paint
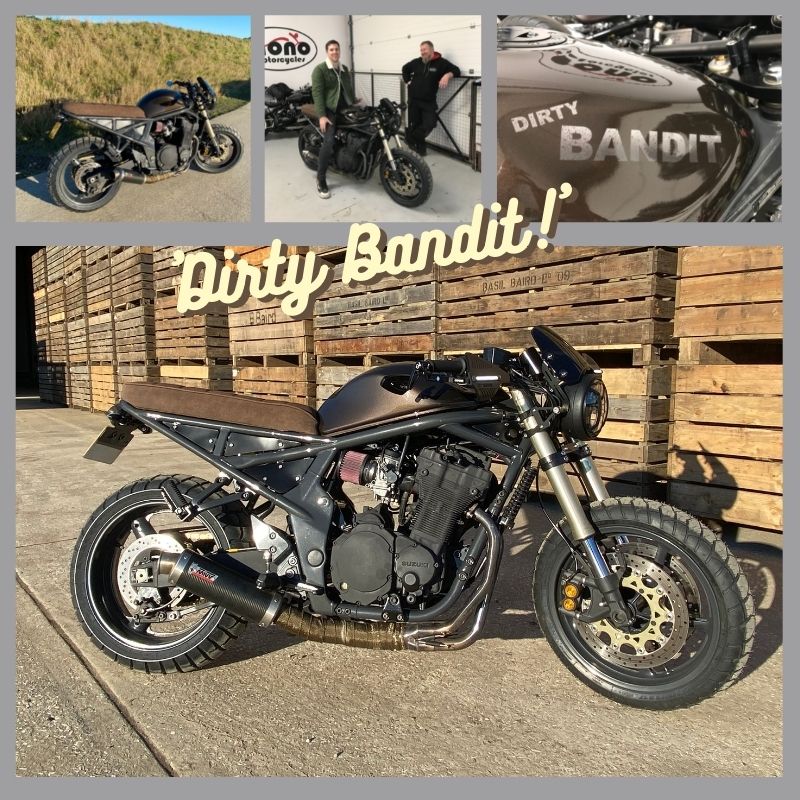
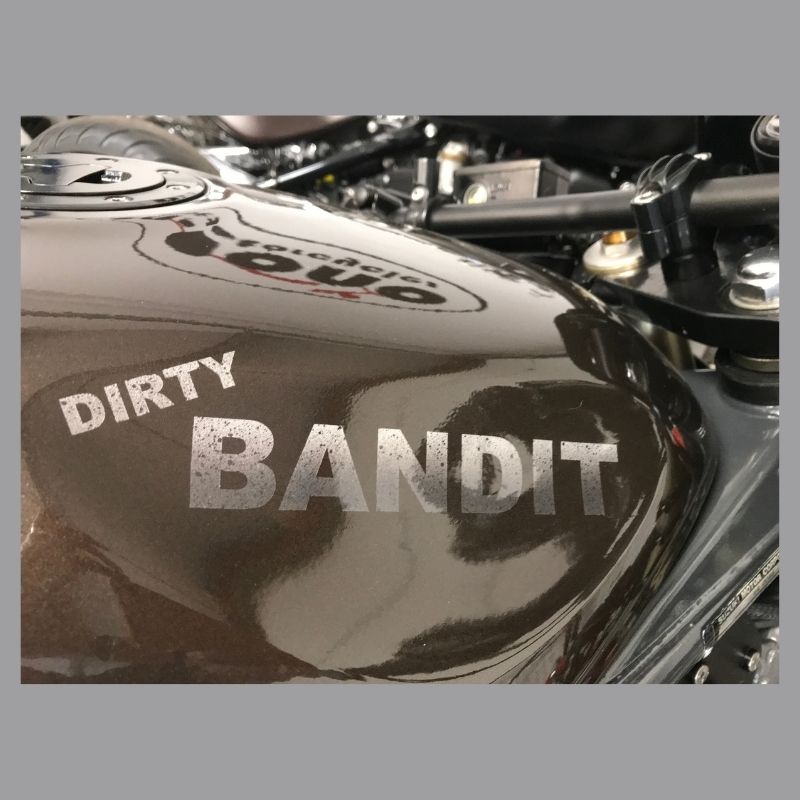
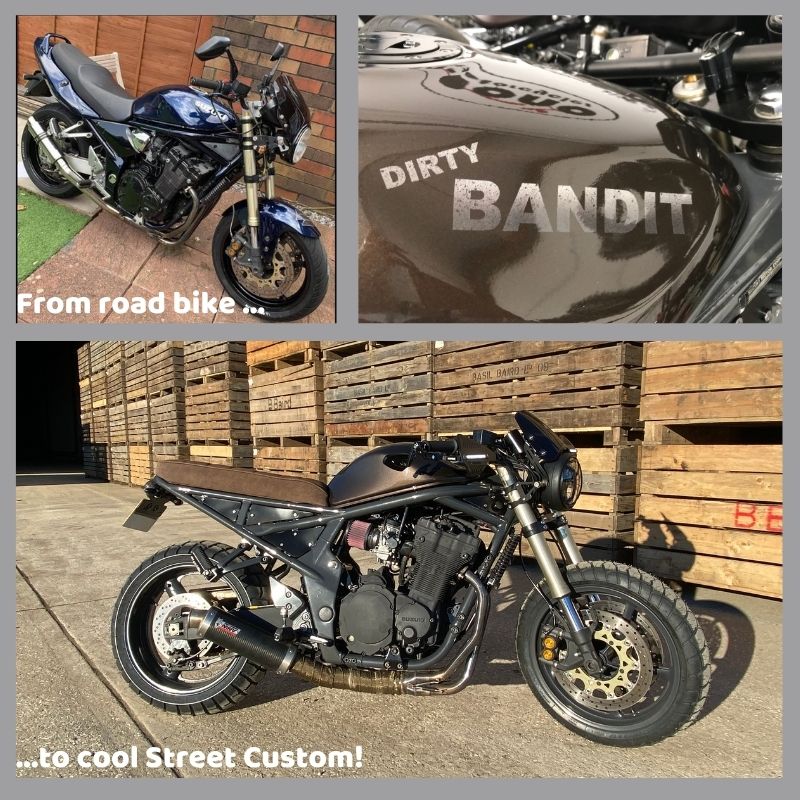
While the GSF1200 was with us, it coined a nickname the ‘Dirty Bandit’ this was due to the fact that our customer had a dystopian/Mad Max vision for the Bandit & it seemed to stem from there.
As we were trying to keep some of the design ideas a surprise for the final reveal, we didn’t let on that we planned on having ‘Dirty Bandit’ emblazoned across the fuel tank.
Therefore, we sent the original tank to the painter & asked him to work his magic. A day later he called us to say that although we had known that the tank had had some filler repairs, what we couldn’t see under the paint was the extent of the repairs or the metal plate which had been welded over a crease!
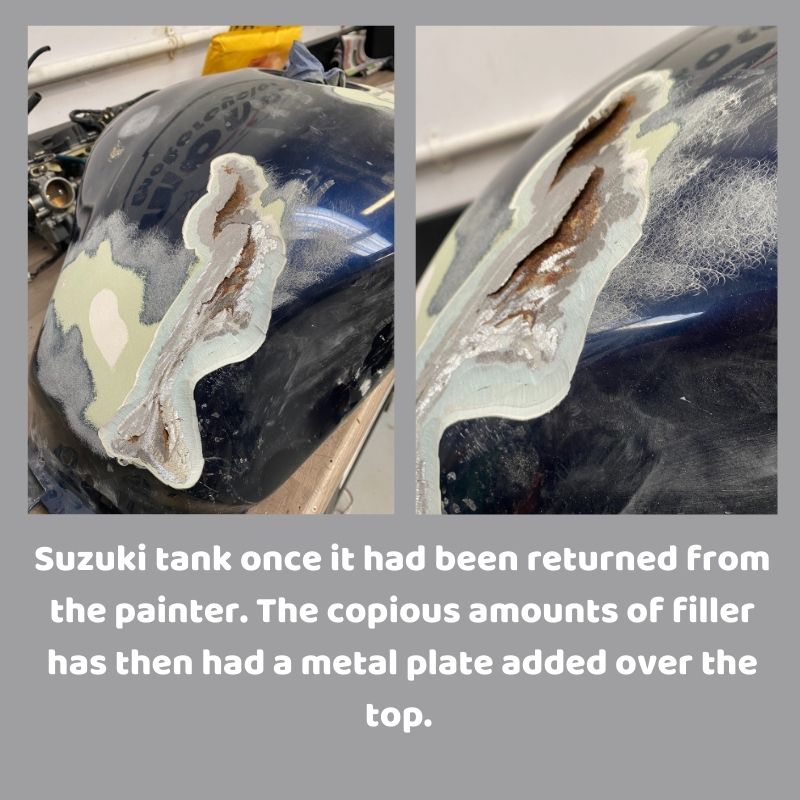
Obviously, the original tank was not suitable for paint & we had to source another one to replace it. In keeping with the ‘Dirty Bandit’ colour scheme, we chose the VW Transporter Chestnut Brown & our painter then decaled ‘Dirty Bandit’ in faded white across the tank. It looked incredible!
The frame & wheels were powder coated in anthracite & looked fantastic against the brown tank.
Wiring
The old wiring loom was cut open to remove the vital parts needed to make the bike run. One thing we did need was the resistor from the ignition switch. The resistor steps down the voltage & stops the bike being hotwired in the case of a theft.

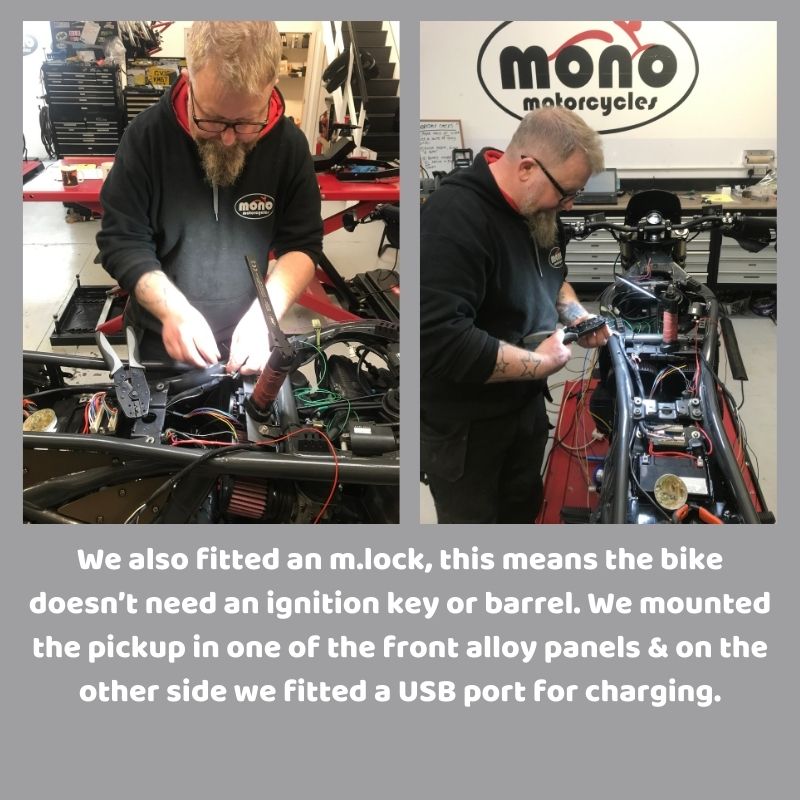
We also fitted an m.lock. This means the bike doesn’t need an ignition key or barrel. We mounted the pickup in one of the front alloy panels & on the other side we fitted a USB port for charging.
After the wiring was complete & using a remote tank, we tried to turn the bike over. Bearing in mind it was a non-runner at receipt (although a runner before the original modifications) the bike had no spark.
Having spent the better part of 15 hours installing a full motogadget system, this was not the outcome we had expected. Therefore, we had to go through the wiring again, interrogate wiring diagrams, research similar faults & all the while being baffled by the lack of spark.
After a day & a half of testing, checking & re-testing everything, the final test was the ECU unit. It transpired it was completely fried. The only thing this could point to, knowing the bike was a runner before it was originally modified; was that the ECU was not removed when it was fabricated & welded originally.
Once a new ECU had been ordered & installed the bike had it’s spark again.
The reveal
After months of re-fabrication, paint, wiring, new tyres, multiple new components, new handlebars & momentary push switches, new lights, bespoke seat, bespoke paint, powder coat, a full rewire using the motogadget system & some stalling points along the way; the ‘Dirty Bandit’ was finally ready for her reveal.
On a very cold January morning, having been covered for the final flourishes; we revealed the ‘Dirty bandit’ to her owner. He was over the moon & as he circled the bike over & over, he kept on pointing out more & more changes, modifications & customisations as he took it all in.

Cost
We always advise customers to have a contingency budget when they embark on an extensive project such as a full motorcycle customisation. There is always going to be something which will change the process along the way, add additional costs, show up unforeseen problems & slow things down; it is the nature of a full customisation & or any extensive motorcycle modification.
Therefore, with 89 cumulative build hours including everything spoken about above; the final invoice including the VAT came in at £9K. With nearly £2800 in parts, the £4500 for labour, supports the extensive craftmanship which went into the customisation (plus the many £££’s in VAT)