Triumph Bonneville & motogadget wiring technology @ mono motorcycles
Written by Daniel Morris – mono motorcycles Proprietor, Master Motorcycle Technician & Motorcycle Wiring Specialist
“Well, it’s been another exciting & demanding few weeks in the mono motorcycles workshop. The Brexit/COVID situation continues to cause disruption especially for parts, not only for us but also for our customers who have been building their own custom motorcycles ahead of us wiring them up.
This supply chain disruption has caused a knock-on effect & created a bit of a backlog of the custom motogadget installs, on top of a heavily loaded service season full of bikes, many of which have not been used in over a year.
The last two motogadget installs we have undertaken, had both been rebooked due to parts not arriving, which ultimately meant they both arrived in the same week!
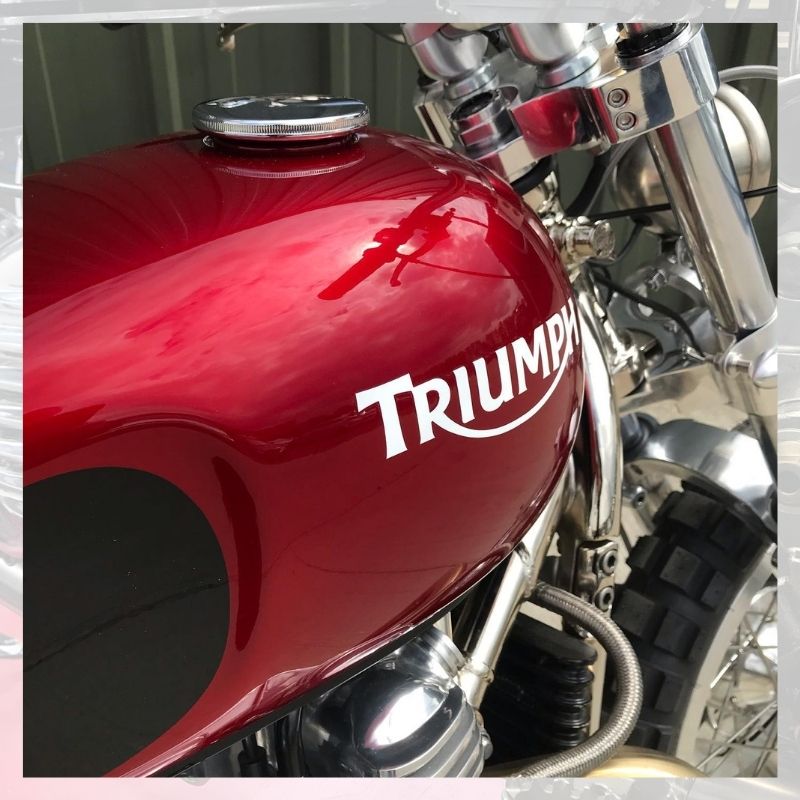
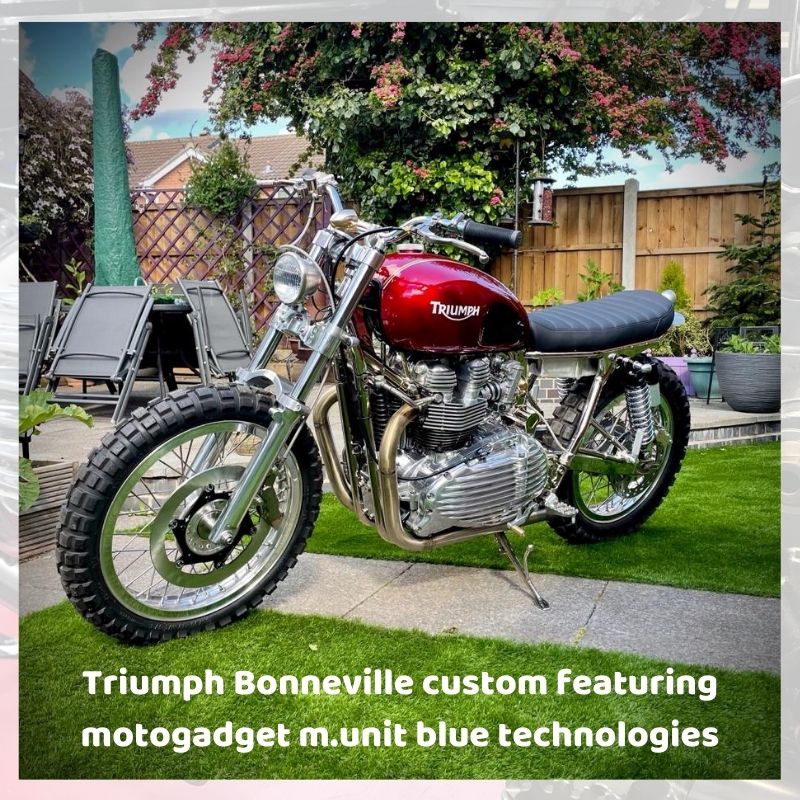
One of the most beautiful builds we have had the pleasure of working on this year (& let’s face it we have had some stunning machines in!) is Oli’s Triumph.
The Triumph was built as a tribute to the Royal White Helmets T140’s in a scrambler style from a 2007 Bonneville 865 & ran FCR flat side carbs & straight through exhausts. The triumph had been built to an extremely high standard by the owner, but upon arrival there was a fair list of parts which still needed completing.

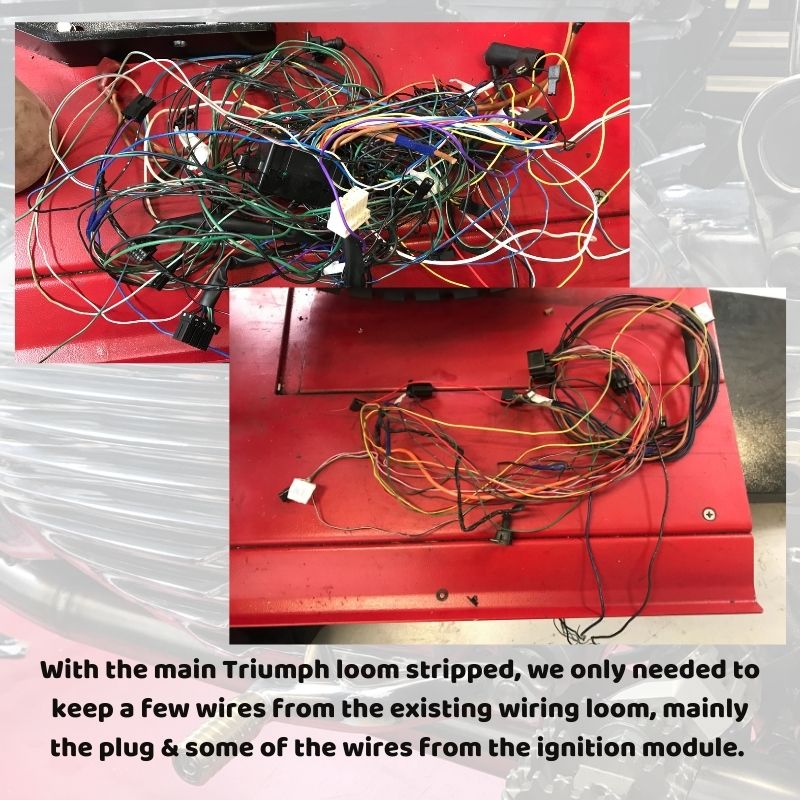
Upon arrival, the original wiring loom from the Triumph had already been removed. It was at this point that we separated out the wires still required to run the bike, ready to create the new motogadget wiring loom.
Two of the key parts missing, were the battery tray & a mounting bracket for the reg/rec. We decided to make the battery box as small as we could get away with, but there was a fair amount to fit inside.
Starting with a cardboard template, we made a box about the right size. Once happy with sizing, Gary made a temporary steel box so we could continue with the wiring while we gave the template to Ben at BM Fabrications to weld up the box in alloy which he then polished.
Next up we needed to mount the reg/rec. The Triumphs reg/rec is a bulky unit which would ruin the look of the bike if it was on show anywhere. Therefore, with this in mind we decided to mount it under the engine towards the back. This had a two-fold benefit of being in the cold air flow to keep it cool & meant we would only need a couple of wires going back up to the battery for the charging system.
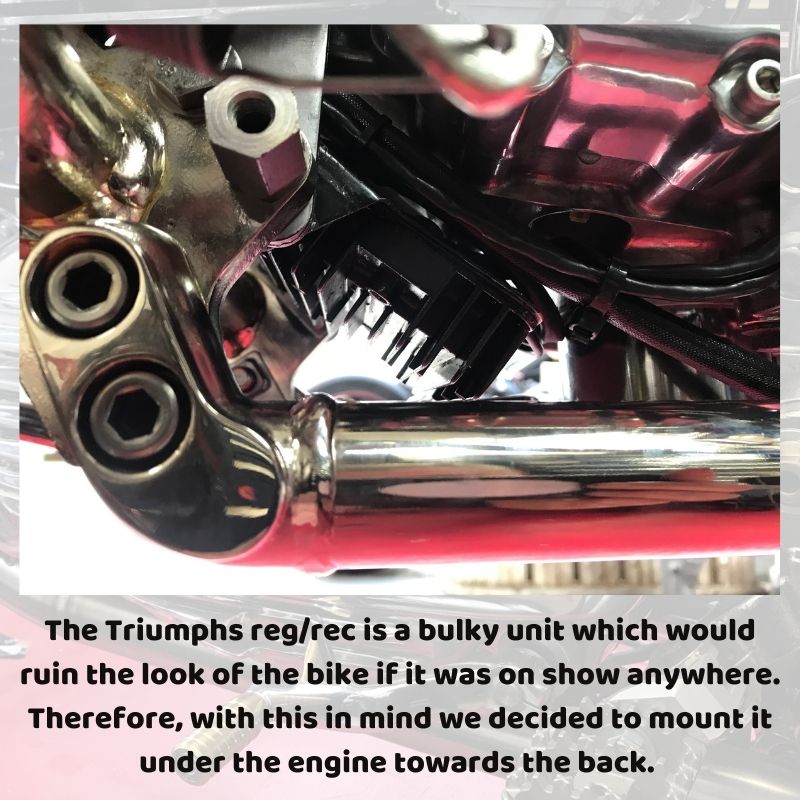
Gary spent a couple of hours fabricating a suitable bracket, before painting it black & mounting it to the rear of the engine.
With the reg/rec & battery box in place we mounted the m.unit into the battery box & made a bracket to fit the starter motor solenoid. Although snug, all of the components fitted within the newly made box.
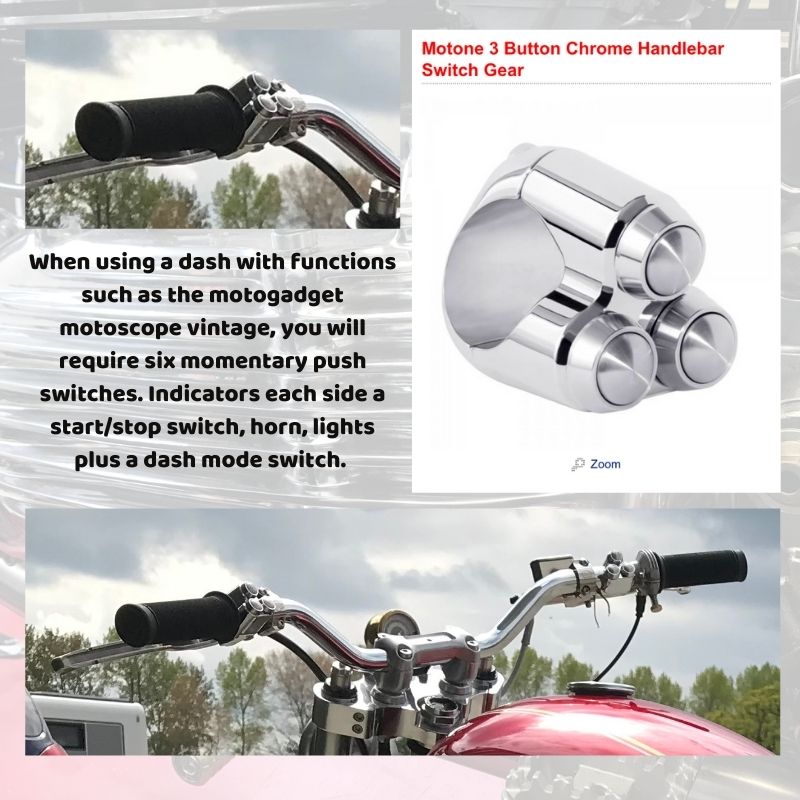
The handlebars were next & we found that the switches provided really weren’t up to the job. Ideally, when using a dash with functions such as the motogadget motoscope vintage, you will require six momentary push switches. Indicators each side a start/stop switch, horn, lights plus a dash mode switch.
In this case, we only had four switches. Therefore, after a quick chat with our customer, some triple chrome switches were on order from Motone on a 24hr delivery.
Upon arrival, we carefully marked the handlebars prior to drilling & de-burring holes for the wires from the switches. With the wires fed through the bars, we braided the ends & connected the wires to the switches. We made a waterproof plug which is hidden under the frame gusset behind the headstock.
With the main Triumph loom stripped, we only needed to keep a few wires from the existing wiring loom, mainly the plug & some of the wires from the ignition module.
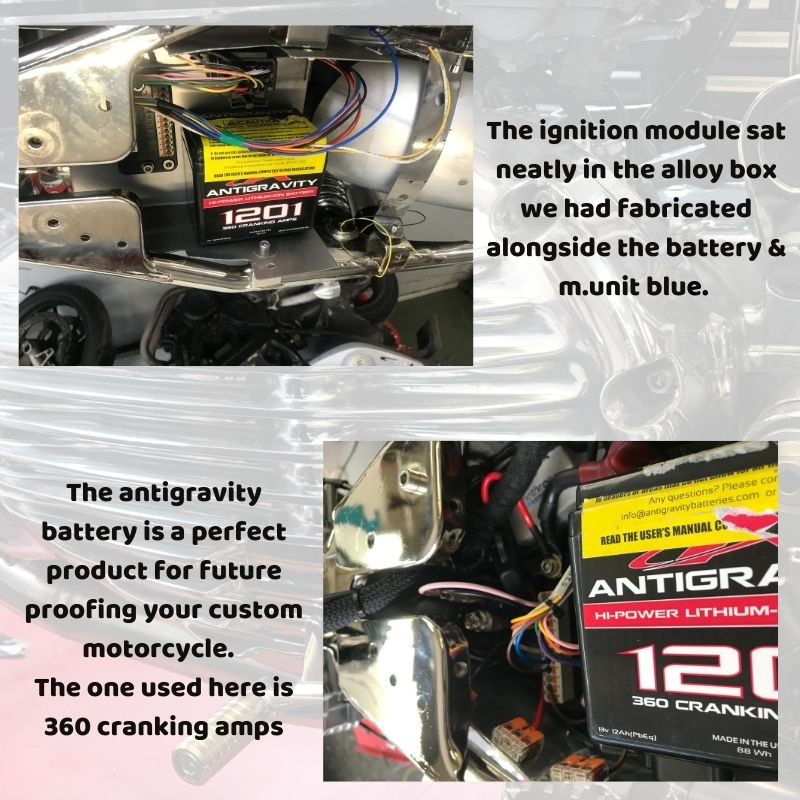
The ignition module sat neatly in the alloy box we had fabricated alongside the battery & m.unit blue. Once the loom from the ignition module was in place, we removed the whole wiring loom again so we could wrap it & feed it alongside the top frame rail.

As with all full rebuilds there are often unforeseen issues & the Triumph was no exception!
On nearing completion we had a few bits to sort before we could fire the Triumph up.
We plumbed in the oil cooler, added some oil & as the engine had been freshly built, we cranked the motor over with the plugs out to bring up the oil pressure. On doing so we discovered we did not have a spark.
Checking over all of the new wiring & works we had completed, everything looked good. Therefore, we checked for switching from the crank sensor. Very little, was the answer! This put us back a bit. We then had to drain the oil back out & remove the engine case to gain access to the sensor. On removal we could see the issue. The sensor was too far from the pick up. Once this was correctly adjusted & a new gasket fitted, the engine now had a spark.
Once we found we had a spark, it was time to set the m.unit up. This is controlled from a mobile phone. The lighting can be programmed, for instance the flash sequence on the rear light, how bright you want the indicators. The m.unit also has an alarm built in, which is fully programmable.
With your mobile phone Bluetooth enabled, the m.unit can see when it is you approaching your motorcycle & this will then enable you to be able to start the bike without the keys.
The motogadget m.unit blue system allows those building custom motorcycles to not only modernise & minimise the wiring; but it also allows them to future proof the wiring systems of their stunning machines.
Not all motorcycles are able to have the motogadget system installed & it must be said, that despite most of the wiring being replaced; there are always parts of the original wiring loom which must be kept & incorporated into the new loom. This is why it is essential to either leave the original loom in the bike & or, if removing it prior to a motogagdet install; it is removed carefully & expertly without causing any damage to the original loom.
It should be noted that the motogadget system is not plug & play. When you receive a motogadget unit, the wires are bare & it is up to the person wiring the bike to make the relevant connections.

We asked our customer if he minded letting us know an indicative idea of the financial investment he had made in the Triumph. Cumulatively, including the base bike & with our part of the bill included; the Bonneville customisation was in excess of £20k.
Customising a motorcycle to a high standard needs a lot consideration, dedication to design & finish & some idea of budget. When you have a budget in mind, always add a third to a half extra for unforeseen costs (they are always there)
As can be seen by some of the stunning motorcycles we welcome through our doors; the investment in high-end & good quality products, services & components; is what is needed to create a polished & professional finish.”
Daniel Morris – mono motorcycles & Proprietor & Motorcycle Wiring Specialist