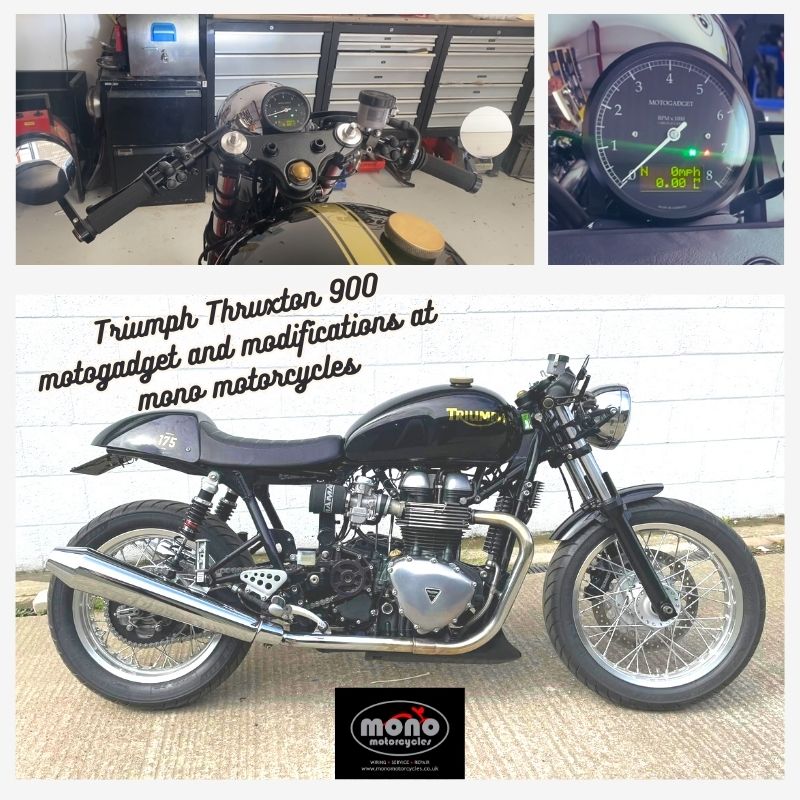
Triumph Thruxton 900 motogadget and modification at mono motorcycles
Written by Daniel Morris ‘Wiring Wizard’ and Director at mono motorcycles.
“Back in March 23 Russell came to visit on his Triumph Thruxton with a few ideas for some modifications.
We spent an hour going around the bike looking at what we could uprate and upgrade. One of the things Russell wanted was to get rid of the standard speedo and rev counter in favour of a motogadget Chronoclassic tachometer. This has the analogue look with a large rev counter and a small digital read out for the speed. We suggested we could remove the airbox and make some small trays to house the battery, ECU and m.unit. Russell also suggested it might be a good idea to uprate the brakes, so I suggested a radial master cylinder and brake overhaul.
With a plan drawn up and Russell pencilled in the diary I sat down to draw up a proper estimate of parts and also draw a wiring diagram to support the build. This is one part of building or modifying a bike customers don’t see and this process alone took around 6hrs to complete.

Six weeks later and the day arrived for Russell to drop over his beloved Thruxton for us to make a start. Most of the parts had arrived however we were still waiting for the dash to arrive, not that this was a massive problem at this point as we had one hell of a lot of work to do.
Week One
The first thing we do before starting a big job like this is check everything works. This includes a diagnostic scan and battery charge rate test. We needed to know if the output was good and check to see if we needed to change the regulator rectifier to run with the small 8 cell lithium ion battery.
Lithium batteries are very easily damaged and MUST run within a voltage range of 12.2 & 14.2v any more or any less and seriously shorten the battery life and with the 8-cell small case being £175 it’s not an option!
Next up we removed the side panels, fuel tank and set about removing the airbox.
Once removed we started by marking up each plug in the loom so we could see where they had to go and also want needed to be kept.
Once the wiring harness was removed, we took off the switchgear, front brake master cylinder, coils, starter relay and headlight. Next, we removed the throttle bodies and blocked off the intakes to stop any dirt getting into the motor.
With that all out of the way I could start to work out where the boxes needed to go. On most builds like this people tend to make a metal box that’s deep enough to stand the battery up in. To my mind this is a messy way to do things, there is no point removing the airbox to have a box hanging down in the lovely open “V” we have made under the seat. The Beauty of the 8-cell small case is it’s only about an inch deep and it can be laid on its side. This means the box was only just bigger than the frame rail, hiding the electronics like it doesn’t have any.
A bit of CAD (cardboard aided design) I folded up a small box taped together and made sure everything would fit, which it did…..just!

Day one completed. We started day two with a bit of fabrication of the boxes in steel.
The front box housing the m.unit, diagnostic socket, ECU and starter relay, with the rear box housing the anti-gravity 8 cell battery. Once the boxes were in and all the parts mounted with any holes drilled, the boxes were removed ready to go across to BM Fabrications for powder coating. I opted for satin black to help hide the boxes once on the bike.

While the boxes were being powder coated I turned my attention to the handlebars and switch gear. First thing was to strip the switches and throttle levers. The Triumph clutch and brake perches are built into the switchgear so they needed replacing. The clip-ons on the standard bike are 1 inch and we swapped this out for 7/8th as this gave us better scope for parts going forward.

The clip-ons are also slightly wider which gives a little more leverage and a bit more space for the brembo brake master cylinder which is the unit of choice. We also added a Domino quick action throttle and cables and a Triumph Street Triple RS clutch perch to match the black brembo master on the other side. Next was the switchgear. We again used the Motone 3 push button switches each side which we have come to love using on our builds.
We drilled the bars for the pin locations and to feed the cables for the switches back to the m.unit. Once the cables were through and the switches wired, the cables were heat shrunk and braid added to protect the loom from snagging.
Day 3 started with a look at the headlight, it was sitting way to high.
This was a simple fix, just lowering the bracket on each fork leg and dropping it down by 20mm. We also had to think about the front Kellermann indicators. I made the decision to fit them into the headlight bracket, the indicators are so small you can barely see them. Well until you switch them on!
We noticed when we originally brought the bike in, the rear caliper was binding. With this in mind we removed the rear caliper but not before measuring the brake line for a replacement one. Once removed the caliper was stripped and had a session in the ultrasonic cleaner. The rear brake master cylinder was on a big bracket but with the airbox gone it stuck out like a sore thumb. I removed the bracket and the old brake line that had a big brake switch on the end. Refitting the master cylinder and adding a new line with the break switch mounted on the master cylinder behind the heel guard really tidied the rear up.
While we were on the brakes we also uprated the front caliper, now this thing will really stop!
Day 4 and the boxes were back from Ben at BM fabrication and having a lovely coat of satin black we could get the boxes in and mounted along with a few of the electrical components.

The battery and m.unit went in first, this meant we could replace the main starter cable from the starter back to the starter solenoid which was mounted alongside the m.unit. We also added the main earth cables. Each cable has a ring connector soldiered on then heat shrunk to avoid corrosion or a short. It may not look like much progress however this little lot took a whole day to prepare.

On the Friday and still waiting for the dash to arrive I turned my attention to the wiring loom which needed cleaning and stripping. Now as this bike is the EFi model it has fuel injection; this means there’s not much we can remove. Firstly, I dropped the whole loom into the ultrasonic cleaner. This not only gets the muck off it also cleans the connector blocks and the pins. It also warms the tape up, so it comes off without leaving too much sticky residue behind.

Once it’s had a 20-minute bath the loom was dried, and all the plugs blown out the loom was then unwrapped. Now this bit is not for the faint hearted and is all about pre-planning. We remove out the lighting circuit and find the live and earths. The fuse box is removed along with any relays, the ignition switch and plugs up to the switch gear.
Once all this is completed, we can then turn our attention to how the loom will sit back on the bike. However, even with the best planning sometimes anomalies can crop up. As this bike is on a changeover year from carbs to injection it wasn’t until I opened the loom up that I discovered the Can-bus wires from the ECU to the speedo.
Rather than just chopping them out I decided to leave them in place until in knew it would run without the dash connected.
Speaking of dashes, we were still waiting 7 weeks after ordering it from motogadget!
Week two
After a busy weekend we were back on it first thing Monday, but I was getting concerned as I was getting to the point where I would need the speedo shortly!
We laid in the injection loom as neatly as we could so we could start to run the wires for the m.unit, in in comparison to the ECU loom it was tiny. With the ECU loom and the motogadget lighting loom now alongside each other the Kellermann rear light were mounted into the frame on each side. The reg/rec was also re-located to under the swing arm to aid cooling and a shorter run from the stator to the battery further improving the charging system.

Once the brakes were on and the system bled, the m.lock ignition was mounted into the headlight bracket.
The bracket was here for the speedo but still no speedo, however I did know if I mounted the speedo on the original location, it would look ruin the stance as it would stick right up in the air. With this in mind I removed the top yoke and ground off the original mounts. A trip over the Ben and he found me a price of 25mm think alloy plate I could use to mount the speedo further down.
Well, it was a full calendar month before we saw the dash (blame Brexit!) but hell was it worth the wait! It was beautiful and a fantastic fitting for this retro ride. The Chronoclassic tacho to give it its proper name has a large rev counter like an old analogue type, but at the base there is a digital readout giving you the speed and vital information this can be scrolled though one of the 6 push buttons on the handlebars.

With this all wired up it was time to fire the bike up. I refitted the fuel tank and lines and spun the engine over. I could hear the fuel pump prime, but it didn’t start. Quick pull of the spark plug told me it had no spark. As it’s an EFI motor we plugged the TEXA diagnostic into the bike and it came up with Can-error fault no communication with speedometer. I connected the plug to the old speedo and it fired straight up.
Now motogadget have got around this issue with a box you can plug in to fool the ECU into thinking the speedo is connected. That’s great we hear you cry! Well not really because it’s special order only and £450! Not wanting to wait another two months a quick call to our customer to ask if he minded me “modifying” his old clocks. He came straight back with the answer I needed. I dismantled the old speedo and removed the circuit board and mounted it in a waterproof box and fitted it inside the now spacious headlight!
With the build coming to an end, we removed the whole loom again ready for taping up. Upon refitting we added waterproof grease to all the connectors.

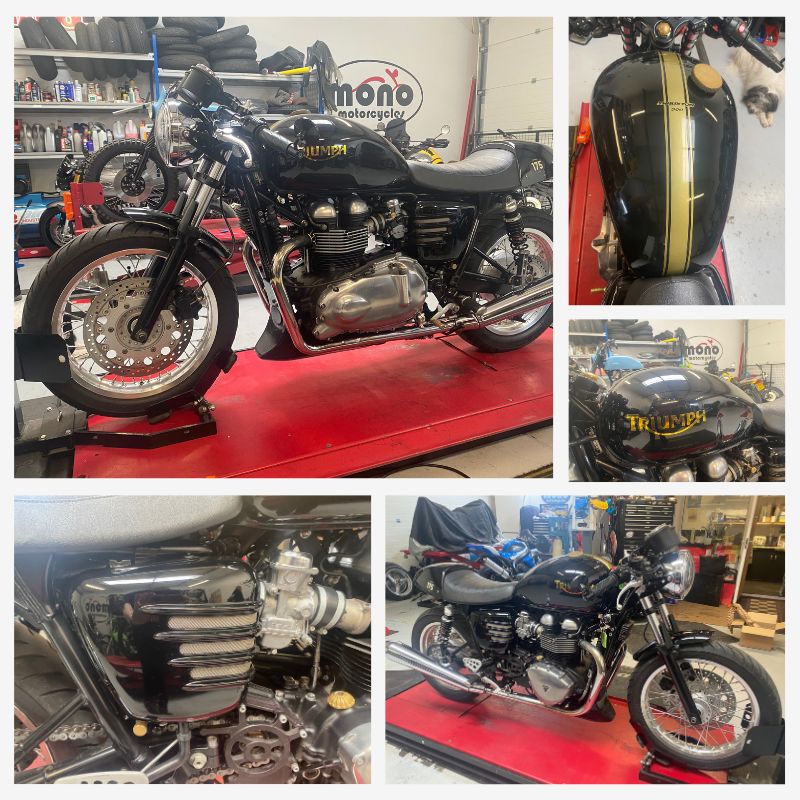
It was a real privilege to be able to create this bike for Russell and we hope he keeps in for many years to come.
Russell understood that the benefits of the motogadget system and the new aesthetics of the bike, would give his Thruxton an edge and make it a unique machine. His investment in the parts and our time is a testament to that. To give you some idea, the invoice included approximately £2.5K parts and including our labour and the VAT the final invoice was around the £6k mark.

If you are considering a motogadget system for your beloved machine, we would love to hear from you.”
Please do send us an email in the first instance giving us as many details about your custom project and your vision for the wiring options going forward. Please send your email for the attention of Daniel Morris to info@monomotorcycles.co.uk