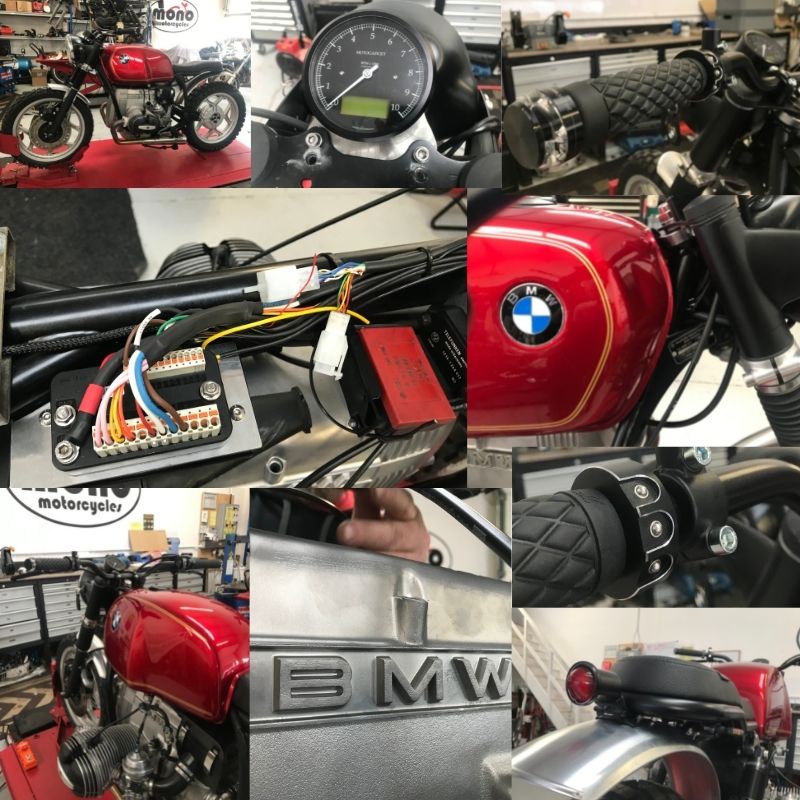
BMW R100 Custom motogadget m.unit blue full re-wire & configuration
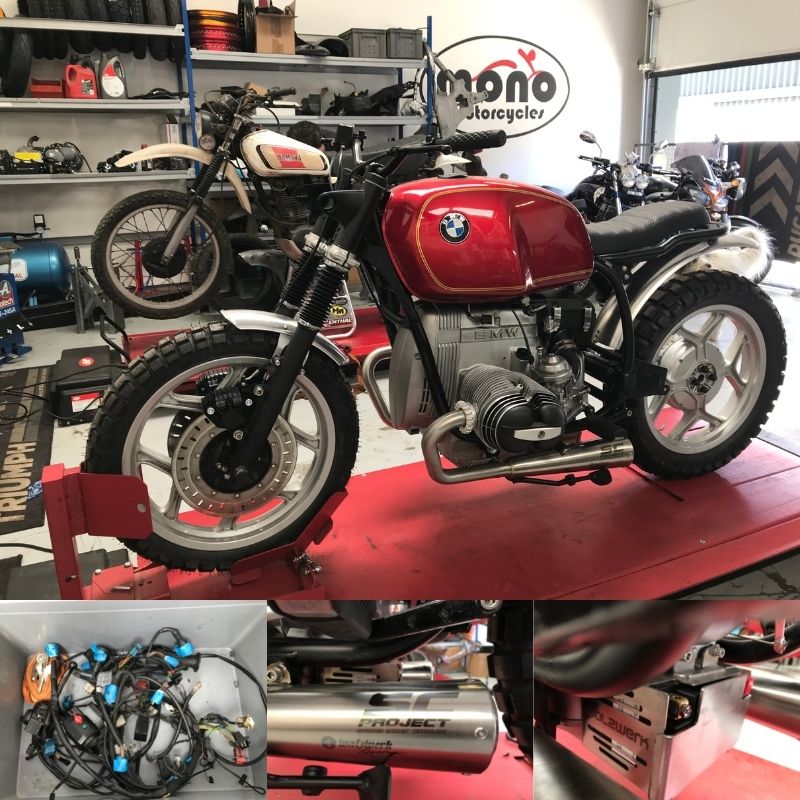
The BMW R100 Custom had been extensively modified before arriving at the mono motorcycles workshop. Our customer was dedicated to a certain look & spared no expense in ensuring that the very best modifications & components were used during the transformation.
When our customer arrived, he presented us with two large grey boxes. One was filled with the original wiring loom, the other was filled with the component parts he had sourced.
Removing the wiring loom prior to leaving the motorcycle with us was an enormous help, as this meant that the wiring could commence immediately.
Our customer had purchased the motogadget m.unit blue. Although the motogadget m.unit blue comes with wiring in the box, it is only wire & this is not a plug & play system.
Our customer had already installed an SC project exhaust & WolzWerk handlebars & battery box. He asked us to complete certain parts of the BMW customisation including modifying the bracket for the rear light, building one of the throttle cables & finding a solution for the ill fitting bracket for the motogadget Chronoclassic speedo.
For the full wiring & fabrication of additional parts, the entire works took us four full days. This is how Daniel, supported by Gary & Nathan approached the tasks.

Before we welcomed the BMW to the workshop, we had several months worth of communication & updates. Brexit & the pandemic delayed the start of the project, due to issues with delays on parts. However, with regular communication from the customer, we managed to ensure that we were all able to move forward once these hurdles were overcome.
Day 1
On day 1 Daniel spent some time ensuring all of the components fitted where the customer wanted them to & started to plan the changes needed to fabricate & reconfigure some of the parts needed.
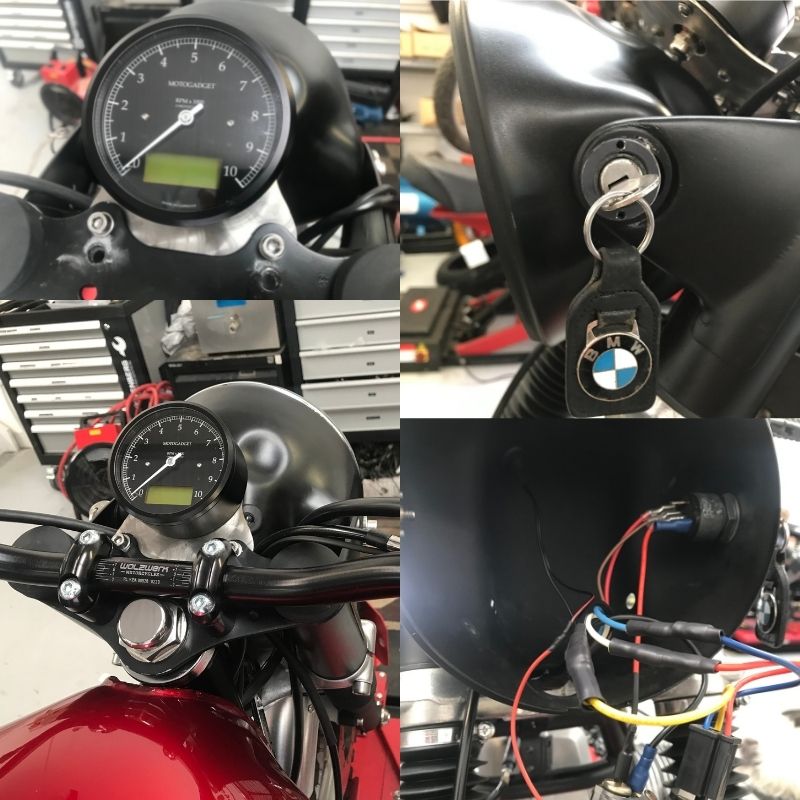
The bracket which came with the motogadget Chronoclassic speedo did not line up with the new WolzWerk handle bars & top yoke assembly. Therefore, it was decided that a new bracket would be fabricated which would fit underneath the assembly, keeping the clean, minimalistic & streamline appearance of the bike intact.
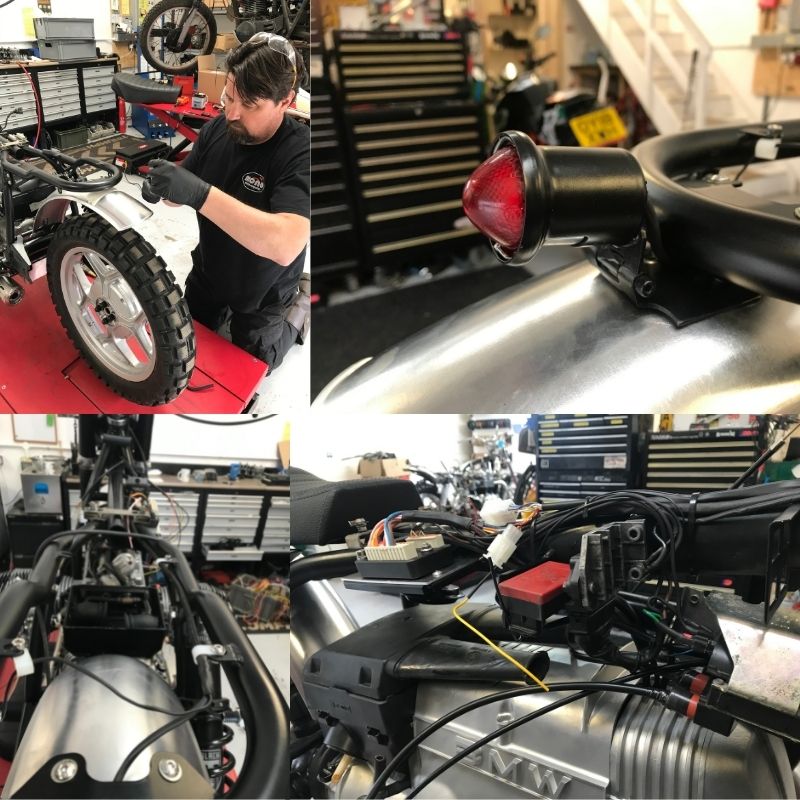
Once the speedo bracket had been fabricated, Gary then got to work re-purposing the rear light/registration bracket to just fit the rear light. Once the bracket was shortened & deburred; it was re-painted prior to fitting.
It was decided that the best place to fit the rear light, was directly into the rear mudguard. On Day 1 the measuring process continued to ensure the light would fit perfectly in the mudguard & avoid clashing with the seat hoop.
At the end of the first day, the headlight shell was fitted & the BMW was ready to have the wiring commencing on Day 2.
Day 2
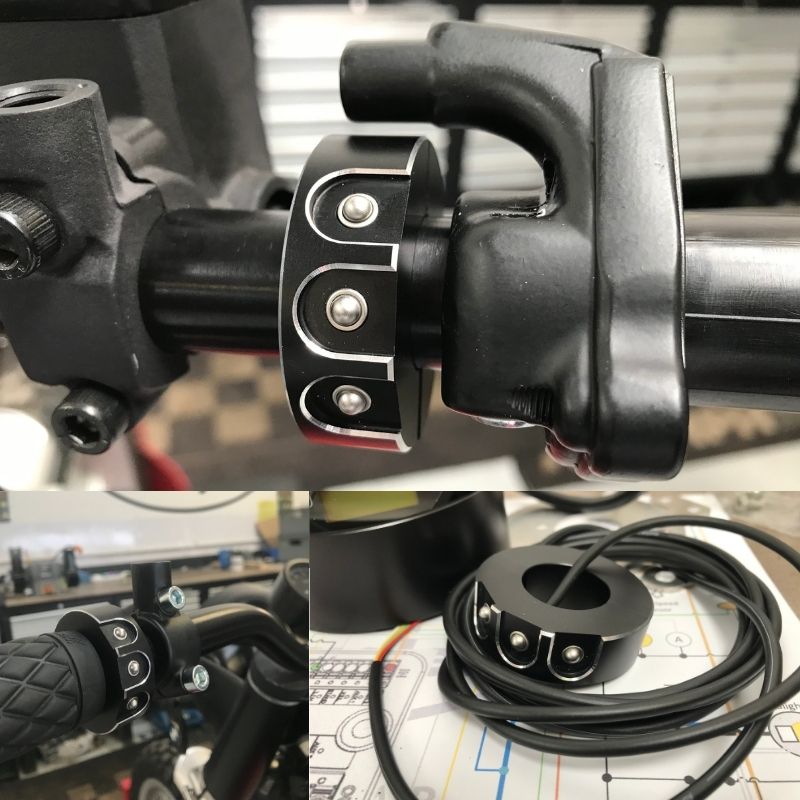
Our customer had chosen to use the motogadget mo.switch momentary push switches to replace the original switchgear.
To ensure a true fit, Daniel removed the handlebars & dummy fitted the switches. To continue the minimalist & sleek appearance of the BMW, he then drilled into the handlebars & ran the switch wiring through them. He then modified the bar end indicators to fit inside the alloy bars.
Having drilled through the top mount & refitted the handlebars; he then fitted the grips. The newly fabricated speedo plate was then polished & fitted & so too was the top yoke.
The newly painted rear light was then fitted into the modified rear mudguard, the wires extended forwards & the mudguard re-mounted onto the BMW.
Once the new speedo bracket had been polished & fitted, it was time to fit the motogadget Chronoclassic speedo & refit the handlebars.
Day 3
To ensure the wiring is as hidden as is possible, Daniel always spends some time fathoming the routes for the wiring & how it can be hidden. This was the case for the power cable.
Having removed the engine top cover, alternator cover & air box; Daniel was happy that the routing through the air box was the best option. Daniel then set about making the main power cable from the starter motor down to the battery box, earth leads & power lead to the m.unit.
Once Daniel had extended all of the cables to the rear of the BMW, he then made a cable to the headlight for the ignition switch, headlight & charge switch.
Once this was in place, Daniel refitted the covers & connected the alternator wiring coil, ignition module & wired the ignition switch. He then refitted the airbox & trunking.

Day 4
As the main wiring was now laid into the BMW, Daniel could now concentrate on the finalisation of the wiring & commence testing.
The headlight, charge light & side light having been wired; it was now time to refit the headlight to the BMW. Daniel then wired the rear lights to the m.unit
The motogadget Chronoclassic speedo was then wired & tested. The BMW arrived with one of the throttle cables not completed. Daniel therefore engineered & fitted a new throttle cable, adjusted to fit & tested.
By using a remote tank & with the plugs removed; Daniel spun the engine to check the oil pressure. As he had suspected, the oil pressure light dutifully went out.
The m.unit must be configured once it is installed & this is done through a mobile phone. The owner of the BMW can then pair his mobile phone with the m.unit & control it from his phone. However, if the battery is disconnected, the m.unit would lose it’s settings & need to be re-configured.
Furthermore, as the battery on the BMW was a Lithium Ion battery, it must be kept topped up with a specific lithium ion charger when not in use. Lithium Ion batteries will not function if left to go flat, unlike a conventional acid battery.

We thought for this blog that we would give an idea of the amount of hours & some of the costs involved installing a motogagdet. Please remember, not every motorcycle is able to run a motogagdet system & it is always wise to check with a professional before embarking on a motogadget system.
Although we completed extra works on the BMW including fabrication & finishing, the total hours spent for all of the work above was 36 hours.
The motogadget parts the customer had purchased were:
motogadget Chronoclassic speedo £435
motogadget m.unit blue £295
motogagdet momentary push switches £240
motogadget bar end indicators £180
motogadget Chronoclassic speedo cup £37
Total £1187.00
Wiring an entire motorcycle takes knowledge, precision, expertise & understanding. Daniel prides himself on his attention to detail, his ability to hide as much of the wiring as is possible & removing bulky outdated & outmoded wiring, switchgear & lighting. In doing so Daniel creates a future proof wiring system with a minimalistic finish, sensitive to the expectations of the custom motorcycle design & finish & the customers requirements & expectations.
If you are interested in the motogadget system for your motorcycle, then please do contact Daniel Morris via email in the first instance with as much information about your project as is possible & perhaps some photographs. We can then work with you to ensure we recommend the correct system for you & help you finish & or bring your custom motorcycle project to life.
Please do email Daniel on info@monomotorcycles.co.uk