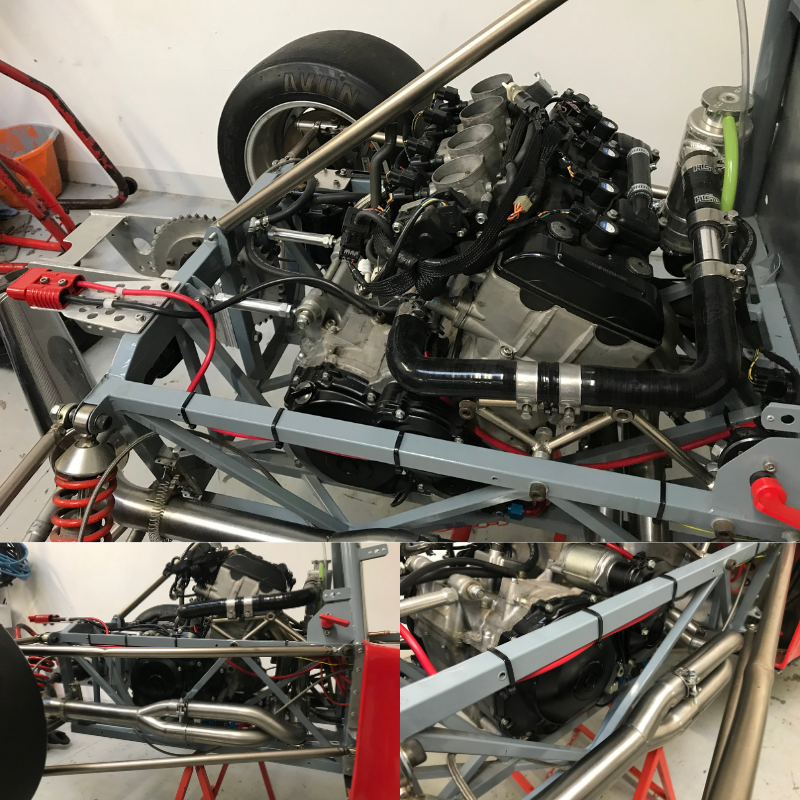
Suzuki GSXR1000 powered Jedi Racing Car @ mono motorcycles
Written by Daniel Morris, Proprietor & Master Motorcycle Technician, mono motorcycles
“A few months ago, we were contacted by a gentleman who owned a motorcycle powered single seater Jedi Racing race car & he asked if we could wire it up for him.
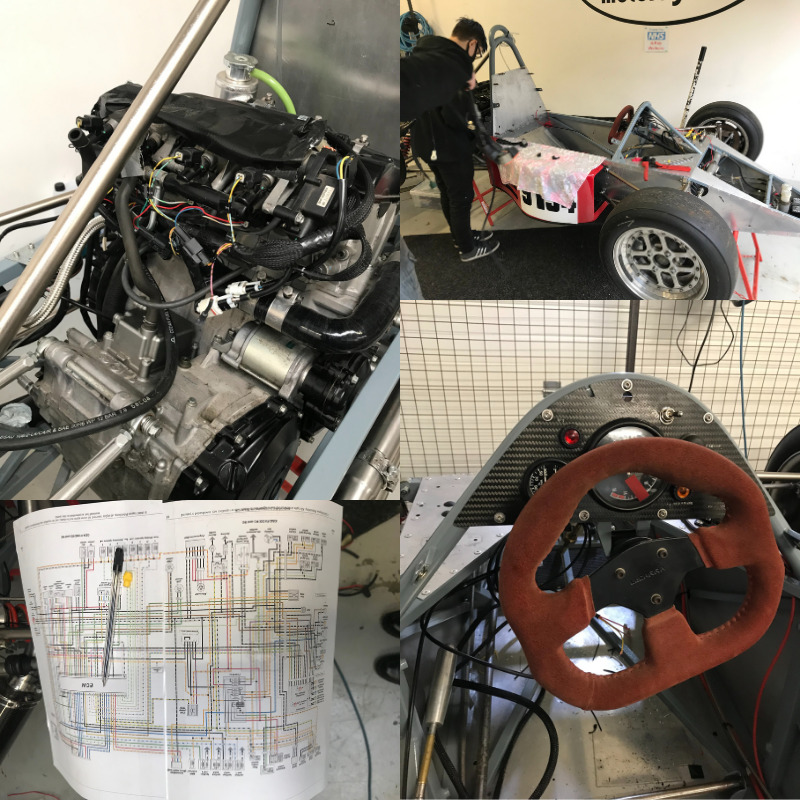
The Jedi Racing car was purchased between him & his late brother originally with a Yamaha FZR motor on carbs. The race car was intended for hill climb events, although there is also a race series for these little single seaters. The owner & his brother set about bringing the car up to date & sourced a Suzuki GSXR1000 engine from a 2008 motorcycle. SBD Motorsports rebuilt the engine & a company in the USA provided the engine loom & ECU.
As the loom /ECU were from the USA, there was no immobiliser to have to bypass which is a blessing as this can be a real issue.
After the engine was originally fitted into the chassis, unfortunately our customers brother passed away, leaving the car not touched for a couple of years.
This is where we stepped in. Our customer asked if completing the wiring was something we would do, & I am sure you realise by now if it’s got motorcycle power we are all over it!
Day One
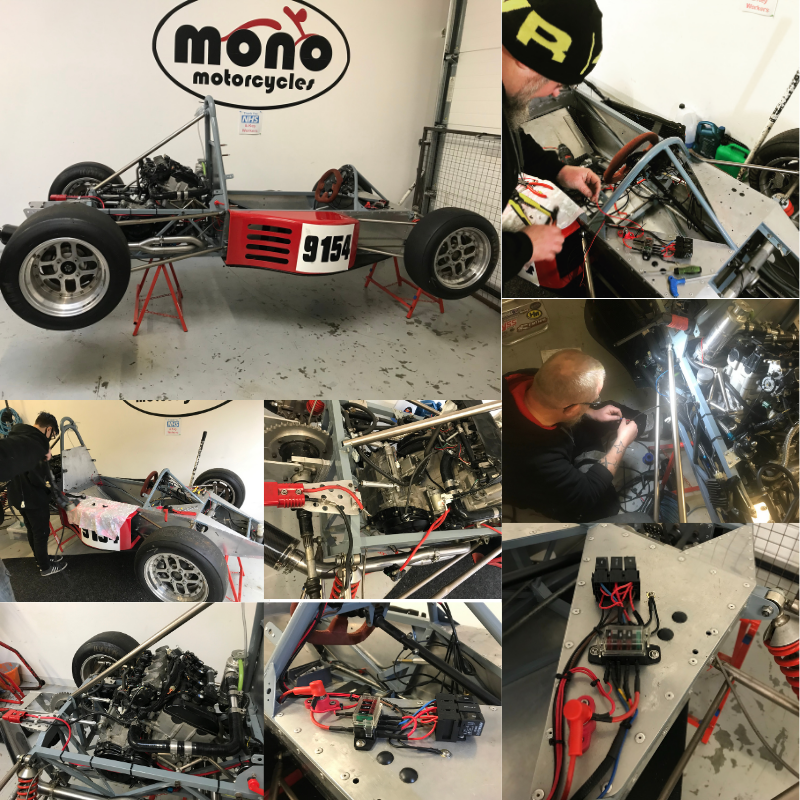
The car was delivered down to us with some instructions on where the customer wanted a few items & myself & Nathan got straight to work. The engine loom was laid on the engine where a few of the power leads were located. However, we needed to run it neatly, so we decided to pull the lot out & start again.
Nathan removed the loom & used our cable marker to label each plug so future works can be quickly identified should the need arise, while I stripped all the power & earth cables.
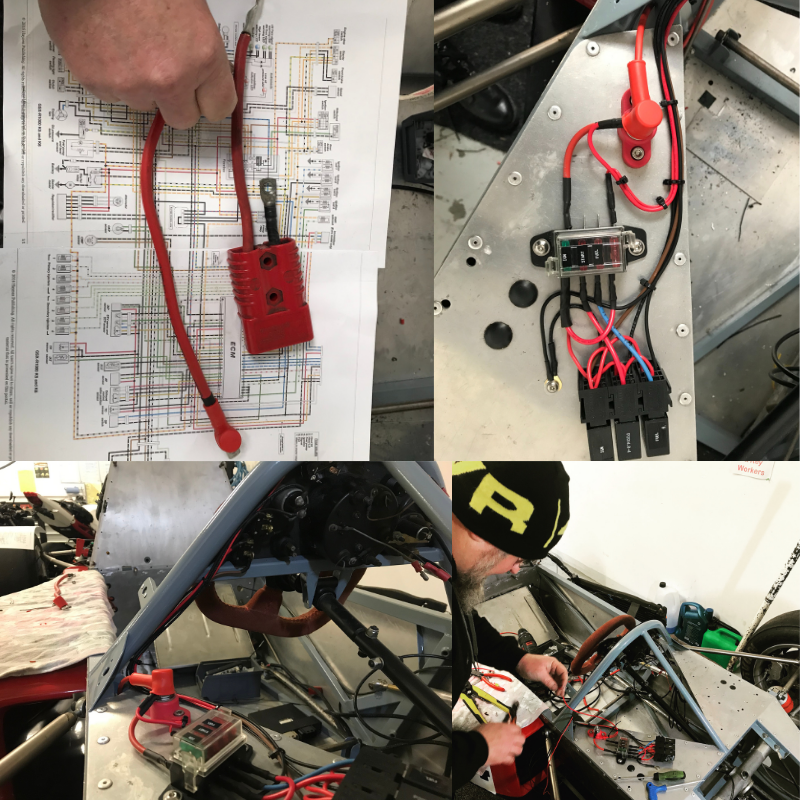
One thing our customer mentioned was the emergency kill switch wasn’t wired correctly so the old engine would continue to run with the switch off! There was also an Anderson plug on the rear of the car (quick release connector for jump starts) The Anderson plug was wired incorrectly so we ordered a new plug for the car.
Once Nathan had labelled the loom, he connected the harness to the engine so we could see locations of each component & work out how we would mount everything. One of the items which needed re-locating was the starter solenoid, as the wires would have touched the chassis with the vibration of the car in action. It made sense to move the solenoid from the rear of the car to the centre just behind the kill switch. This also helps with volt drop as the cable runs are shorter.
With the starter solenoid in place we could then make up the new power & earth cables. Each cable has an eyelet that we solder into place then heat shrink over the top. We mounted the cables on the correct side of the kill switch but left the Anderson plug until we were finished.
With the engine loom in place & eight hours done we called it a day.
Day Two
On day two we concentrated on the dash area. We had three wires coming from the wiring loom that went the full length of the car. However, these wires were not labelled. Therefore, a quick check with the multimeter determined one was for 12 volt supply to the ECU, one was for starter & the third was for the rev counter.
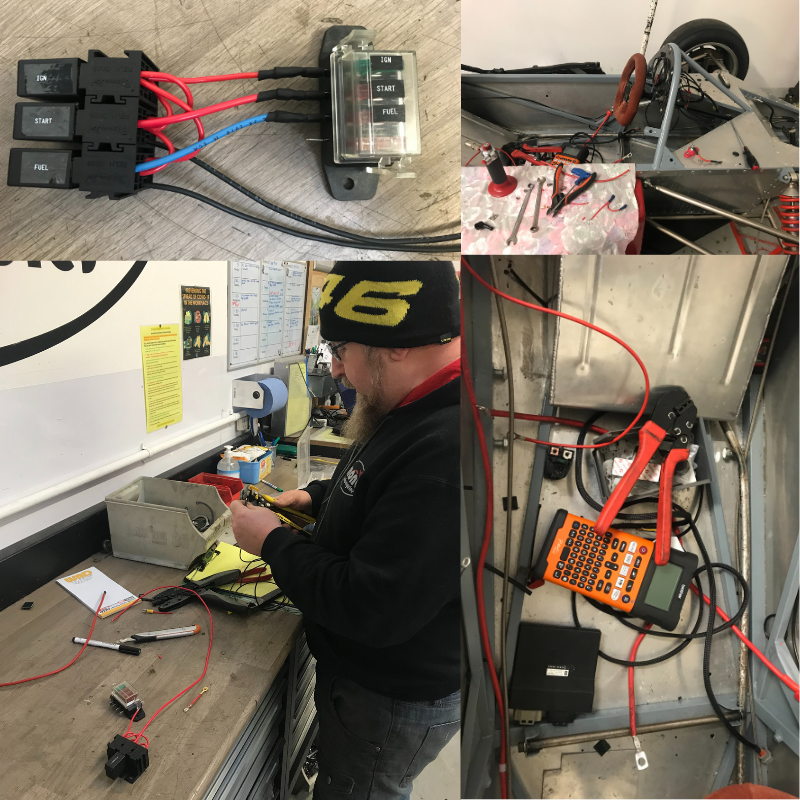
The dash has a switch for the ignition, a second switch for the fuel pumps & a start button. On the other side is a water & temperature gauge & an oil pressure warning light. We were asked to put a fan override switch in to cool the car after a run.
I did a little drawing to work out how the dash would work. We installed a small fuse box & 3 relays to control each circuit. The ignition had to come on first so the fuel pumps couldn’t be left on, also the start button needed to be dead until which time the ignition circuit was live.
We also considered that the fan would need to run without the ignition on, so at the end of a run the fan could continue without the need to have the whole system live.
Next we had to run the loom from the front to the rear of the car. In addition, we needed to add a wire for the oil pressure switch, fuel pump supply, plus a live feed to the fan. We mounted the cabling along the chassis with cable ties & “P” clipped the cable where it crossed the floor. We had to make a new piece of loom to connect the fuel pumps & connect our supply wire. Once this was done Nathan added a relay & circuit to control the fan.
Once the front was wired up, we could run through some basic checks. First, we checked the ignition system. This was all good. Then we switched on the fuel pumps. We checked for leaks which was all good. Next, we disconnected the crank sensor so the car wouldn’t start & spun the engine over to raise the oil pressure. Oil leak! The sprocket cover wasn’t fitted & oil came spraying out the clutch shaft.
A rummage through the box of accompanying parts found the offending item which was quickly fitted. Oil light out we reconnected the crank sensor & hit the starter. The engine fired straight up! Good days work with a few bits to complete the next day.
Day Three
With the engine running we could add the charging system. We mounted the reg/rec in direct flow of the air on the side of the chassis. This also meant we didn’t need to extend or alter the wiring as this can cause the loom to get hot. The charging wires went back to the kill switch & the other two to the chassis earth. Meter across the battery showed a solid 14.2v running. Perfect.
With the charging done we moved onto the Rev counter. This just needed the supply wire from the engine & an earth. Finally, we went around the entire car making sure all the connectors & connections were good & tight.
Happy we had covered everything; Nathan ran the hoover around the car & gave it a wipe down ready to go home.
Total time 20 hrs.
We have a Rage buggy coming in next month fitted with a Honda Fireblade engine, could this be the start of something new? I guess only time will tell.”
Daniel Morris, mono motorcycles